Astrophotography

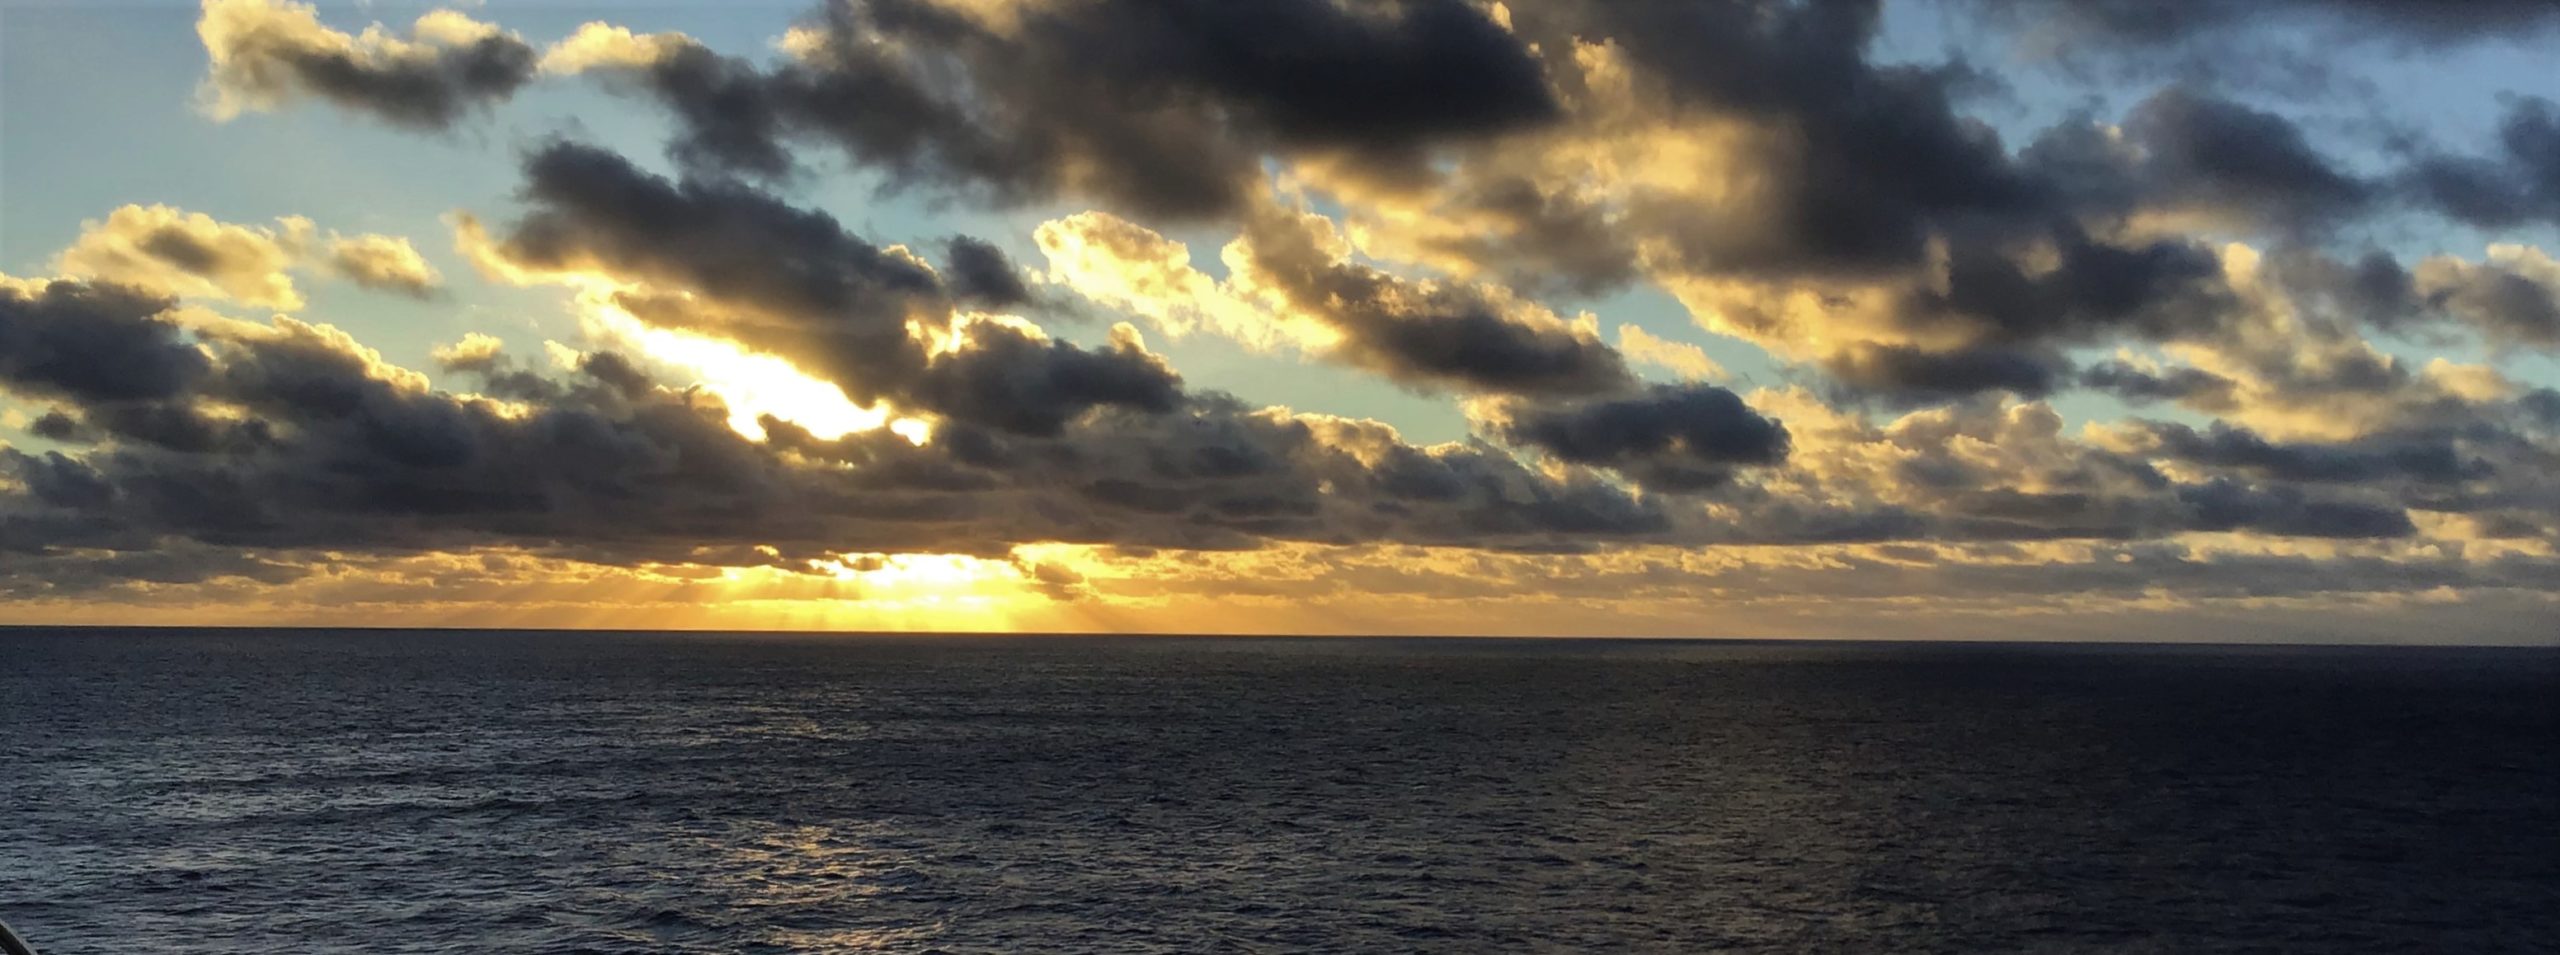
Last night we gave astrophotography a whirl out in the Cape Hatteras National Seashore. We had mixed results, but I learned a great deal about technique and improving my planning and preparation. In addition to Julie, my brother and sister (Shawn and Colleen) came along to watch and get a chance to see the stars against a really dark sky.

Location

In selecting the location there were two main factors. First, we looked at the darksitefinder.com map for a dark location. Second, we looked for someplace close to the Outer Banks because, what the heck, that’s where we were. What we found was a spot south of Salvo on NC 12 that had very dark skies with little light pollution, so that’s where we headed.
A lush green valley with a river flowing through mountainous terrain under a cloudy sky.

Equipment

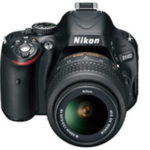
You probably need a digital SLR for reasonable results with astrophotography. Capturing enough light to record a good image means a longer exposure and higher light sensitivity. For my Nikon D5100, I attached a Sigma 10-20mm f3.5 lens. That seemed like a good choice for astrophotography because it’s pretty fast (has an f3.5 aperture) and the wide-angle lets me capture more of the sky and horizon.

For astrophotography, the D5100 is very flexible. I set the focus to manual and initially pushed the ISO (light sensitivity) up to 1600. That captures the limited light faster. Then I played around with exposures ranging from 10-25 seconds. Fortunately, I’d packed a small, light tripod that gave me a stable platform for the photos. Okay, I guess we’re all set.

Work in Progress

What I discovered about astrophotography is that working at the seashore is a lot different than in the mountains. Julie and I made an unsophisticated attempt several years back in New Mexico. Outside of Albuquerque, the skies were awesome, but the pictures suffered from poor equipment and our clumsy approach. As the skies darkened near Cape Hatteras we realized that sea level combined with the humidity in the air conspired against us. The sky was fantastic, but not as sharp and clear as we’d seen in the West. When you think about it, at sea level you’re looking through a lot more atmosphere and the increased humidity definitely impacts clarity.

Regardless of the humidity, the sky was dark and I thought the stars looked pretty clear. After a few initial attempts, I really had to push the light sensitivity of the camera up to keep the exposure duration relatively short. The pictures were shot at f3.5 for 10-25 second exposures. To get anything close to what I was hoping for, I had to set the ISO (sensitivity) to 3200, but that resulted in a lot more noise in the photos that I wanted.

Results – First Pass

Person in a red jacket stargazing under a star-filled night sky.Night sky filled with stars and faint red light streaks.
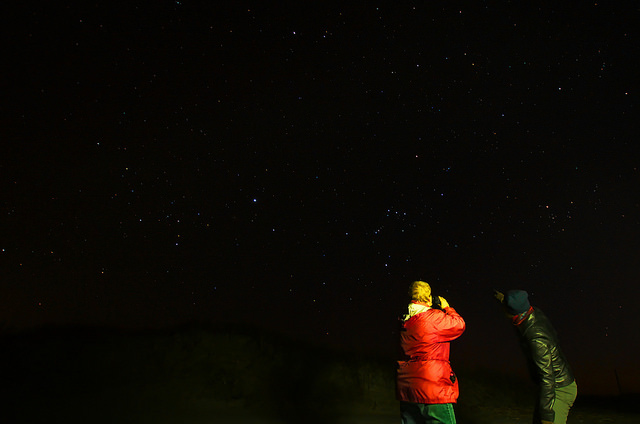
The last issue was camera related. With astrophotography, we’re dealing with points of light in the dark sky. Focusing accurately was turning out to be a problem. First I tried just setting the focus to infinity but I got some blurring. Trying to manually focus gave me some success, but the results weren’t very good either. We left the beach that first night with some decent shots, but there was still too much blurring for me. Here’s one of the photos that came out pretty good – Julie is pointing out the constellation Orion to my sister.

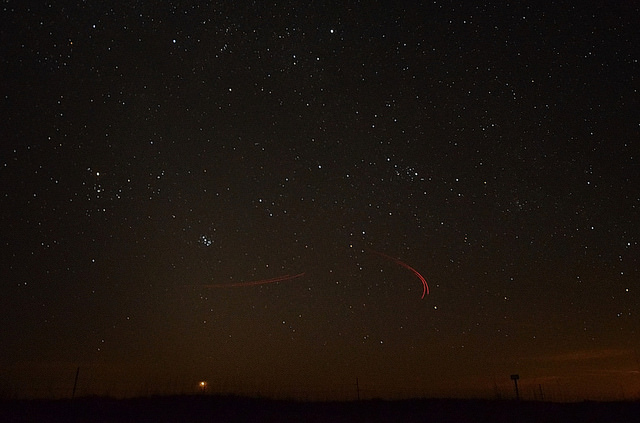
The second photo is more interesting. My brother Shawn saw these faint red lights moving in the sky to the west so we quickly repositioned the tripod and took a 15-second exposure. We’re 90% sure that they were military aircraft, but my brother is still pushing the UFO theory. You can see the red streaks in the lower third of the captured image. That bright spot near the bottom is Venus setting to the west. The cluster of stars left of center is the constellation Pleiades or the Seven Sisters.

Astrophotography Research

Sitting at home the following day looking at the photos I tried to figure out how I could do better. The first thing I figured out was that I’d forgotten to remove the polarizing filter from the lens. In hindsight, I wonder how I’d missed that. I’m not sure how much light gets blocked by the filter, but looking around on the internet I see estimates in the 1.5 – 2.5 f stops range for decreased light. No matter how you look at it, that’s a significant reduction in light getting to the camera sensor. That filter came off right away – first problem solved.

The next problem I looked at was focusing. Back to the internet! At first, I was hopeful about articles I was finding on focusing baffles, but that turned out to be for photography through a telescope. Then I came across references to ‘live view’ on Canon cameras. I checked on the Nikon site and found that the Nikon D5100 had a ‘live view‘ feature as well. After experimenting with this a few times in daylight I felt ready for the next nighttime opportunity.

Another Night

Rather than driving an hour south into the Cape Hatteras National Seashore, we set the camera up on the deck in Nags Head. There is plenty of light pollution here and lots of cars drive down a nearby highway, but I just wanted to test out the fixes I’d come up with. I was very happy with the results.

First, removing the polarizing filter had an obvious impact on the brightness of the photos and the clarity. Even with the less than ideal sky, I was able to get much better photos, even with the ISO set at 1600. Next, I tinkered around with the focusing issue. That turned out to be a little trickier.

Live View

Looking at the ‘live view’, I was initially presented with what I thought was a blank, black screen. It turned out that finding a star in a dark sky to focus on can be more challenging than you might think. After a bit of tinkering, I was able to find and center a bright star on the display screen of the camera. Next, I manually focused the image and then zoomed using the ‘live view’. Using that display screen I was quickly able to manually adjust the focus to get a really sharp and crisp image! Nice! Now let’s take some photos.

I only took a few photos because the sky in Nags Head was not great for astrophotography, I was more than happy with the results. The stars in the images were finally clear and crisp and the lower ISO resulted in less noise in the resulting images. When I zoomed in on the image from the 25-second exposures, I could now clearly see star trails from their rotation in the sky. That’s not an issue because my goal is for the broader effect of photographing large portions of the sky. All in all, the results were a great improvement and I’m now confident that the next time I get out for nighttime astrophotography I’ll be ready.

North Carolina’s Outer Banks Day Trip

Outer Bank’s Day trip

For a new adventure, you should try an Outer Banks day trip to Cape Hatteras. The drive from Nags Head to Cape Hatteras along North Carolina’s Outer Banks is a great way to spend a day and see some stunning scenery and get a feel for the isolation of Cape Hatteras from the mainland. We started our trip on Roanoke Island with a cup of coffee at Front Porch Coffee. With caffeine in my system, we headed for NC Hwy 12.

The name Virginia Dare vaguely meant something to me as I saw the Virginia Dare Bridge headed back east towards Nags Head from Roanoke Island. I found a lot of interesting information looking further into the history of Virginia Dare. You can find a great summary here at the Outer Banks website. I’d also recommend another day trip to the Fort Raleigh National Historic Site on the north side of Roanoke Island.

NC Route 12 South

As you come to the split in the road at US64/US158, head south on NC Hwy 12, the Cape Hatteras National Park Road. This road continues south all the way to Cape Hatteras and beyond. Note your mileage as you start on the Park Road. Along the way, you’ll pass through a variety of coastal terrain and environments and have plenty of interesting stopping opportunities. Right now, I think the Herbert Bonner Bridge makes a great first point of interest.

Herbert Bonner Bridge

The Herbert Bonner Bridge, about 8½ miles down the road, is currently being reconstructed. Actually, a new bridge is being built parallel and to the west of the current bridge. This is a great teaching opportunity for younger kids as they can see the many different phases of construction.
Curved bridge stretching over calm water under clear blue sky.
Even as an adult, I found the effort amazing. The one downside is that you only get a chance to really see the work when you’re stopped in traffic (single line of alternating traffic across the approximate 2.8-mile span). The construction should be complete in November 2018 followed by the demolition of the existing bridge. This $246 million effort is a truly amazing site when you take the time to digest the scope, complexity, and scale of the work underway.

At the end of the bridge you’re on Pea Island; don’t ask me where the name came from, I have no idea. As you continue south on NC 12 you pass miles of sand dunes to the east which block the view of the ocean, but on their own they’re amazing. As you get to the towns of Waves and Salvo, you’re close to a great place to stop and stretch your legs.

Clarks Bay

A lush green valley with a river flowing through mountainous terrain under a cloudy sky.About 29 miles down the Park Road and just outside the town of Salvo watch for a sign for the Salvo Day Use Area off to your right side. While not very glamorous, all the way at the north end you’ll find restrooms and not too far away, some weather-beaten picnic tables at a beach. We found this a great place to stop, stretch our legs and explore the sand along Clarks Bay. After you’ve got your energy back up, it’s time for the day trip to continue as you explore the sand dunes.

Beach Access Roads

As you continue south on the Park Road there are beach access roads every several miles that give you a chance to explore the sand dunes and get a view of the Atlantic Ocean. The first one is about a mile past the Salvo Day Use Area on the left – the ocean side. There’s a parking area with a boardwalk to the dunes, or you can chance a venture down the side road. A word of caution – heed the warning signs as the road turned suddenly into tire sucking sand…not recommended unless you have 4 wheel drive.

The walk to the beach is less than 800 feet and you’ll hear the roar of the waves as you get nearer. The day we were there, the wind was from the east. Up until we reached the crest of the dunes, it was not too windy and it was warm. As we walked through a gap in the dunes the intensity of the wind quickly increased and our experience transitioned into a wild and beautiful combination of wind, sand, and waves. The magnitude of difference from the relatively placid Clarks Bay on the west side to the Atlantic Ocen is stunning. You have to experience it.

Over the next 10 miles, there are several more access roads, each with different experiences. At one point the width of the island is less than 800 feet and along the entire road, sane is everywhere. There’s also a stretch of protected areas where you can’t enter; just watch for the signs.

Lighthouse – Mile 47

The Cape Hatteras Lighthouse is near the end of the road at… you guessed it – Cape Hatteras. This is a small community with rental property and camping out at the edge of the ocean and miles from the continental United States. The isolation is sobering when you consider it.

The Cape Hatteras Light Station, as it’s officially known, is part of the Cape Hatteras National Seashore. There are ample parking spots and a nice visitor’s center. The station was manned from 1803 until 1935 and served to warn ships of the dangerous navigational challenges of the area. It also served as a reference point for navigation. The lightkeepers were responsible for the operation of the light which included raising large weights every 2-3 hours which provided the mechanical power to precisely rotate the light. There’s an array of stones set outside the visitor’s center, the carved names of the lightkeepers recognize their service.

More to come…

Technology… huh?

Six words I’ve heard a lot these past several days are “No Grandpa, let me show you.” And here I thought that as Baby Boomers we knew more than a four-year-old.

Unspecting Baby Boomers

Julie and I are watching our ‘almost two’ and ‘almost five’-year-old grandkids while their parents take a well-earned vacation. Amongst the walks, playgrounds and library visits, “The Sound of Music” is available “on the blue ray player”. (I never had a blue ray player) Naive me was thinking that a ‘blue ray’ was like a VCR… no problem I told myself.

What the heck is a PS4?

It turns out that the ‘blue ray’ is actually a PS4 machine – a play station four. Whoever invented this darn contraption must have intended it as a torture device for Baby Boomers. First off, there are only two buttons on the box itself. I stared at it in disbelief until one of the grandkids uttered a version of that annoying phrase… “I got it, Grandpa” and magically, the box came to life. Now, how to start it playing the movie…

As I sat there staring at the PS-box, muttering to myself and pushing the non-power button I hear another version of – “That’s not what you do. Here, Grandpa, let me show you…”. With that, the almost-five-year-old picks up something that looks like a cross between a palm sander and a flight control for a spaceship and tells me to “just use the menu’. Like the box, this thing has no labels, just a bunch of ridiculous symbols. Some of the buttons have no labels at all. Another Baby Boomer torture device.

How does she do that?

In seconds, this ‘almost five-year-old’ flew through menus and has skipped ahead to the part that she wanted to watch. When I asked her how she knew to press ‘those buttons’, she gives me a confused look and says, “That’s just what you do, Grandpa.” Defensively, I tell her that I understand technology, but I’ve never used a PS-thing before. In what I swear sounded like a patronizing tone she tells me, “I know. It’s okay, Grandpa”. “No,” I say with a more defensive tone, “I worked with computers for over thirty years… I even wrote database interfaces in C…”. She patted me on the knee and asked if we could just watch the movie now.

I really do understand technology… really. I retired because I could, not because I got too old for the technology. Really.

Washington, DC Snow

We headed south to escape the cold and snow of Western NY. For our troubles we landed in the middle of the worst snow storm of the season in Washington, DC.

Snow-covered street lined with frosted trees and parked cars on a winter day.
DC Snow

Now, I have to say that this ‘worst storm of the winter‘ was nothing by Western NY standards, but it virtually closed down the District of Columbia. It seems that they have few plows here; the schools were all closed and the Federal government was shut down. Traffic on the roads was pretty light, so getting from our hotel to Monica’s home was relatively easy and having a snow day with the Grandkids was great.

On the other hand, snow on the first day of spring was not in my imagined version of our first week of retirement. It’s disturbing that my fantasy world of retirement is already crumbling on day-four. I’m hoping that clear skies are ahead!

Step Three – Hit the road

Yesterday we hit the road. Based on our experience trying to get out the driveway I have a few tips for the rest of you. First, think back to Step One (Move out of your house) and make sure you got rid of absolutely everything you could have.

We were loading the car up on Sunday, I’d already packed the car absolutely to the gills. Since there was definitely no more room, I walked back into the house. Julie was standing in her Mom’s dining room, arms crossed, surrounded by stacks of “stuff” on the floor. She announced, in a serious voice, “This is all that we have left to load…”

Step Three-A – Unload the car and start over.

Half the “stuff” we planned to take came back into the house since something had to give. We then started the process of again loading up the car, this time with a re-prioritized focus. Eventually, we managed to close the trunk and squeeze the doors to the back seat shut. For about the 50th time in the last six months, we asked ourselves, ‘where did all this stuff come from?’

Sunday night was the end of the first leg of our road trip and we’d made it 75 miles to our son’s house outside Rochester, NY. Those 75 miles sure seem like a pretty good start, as a result, we’re feeling very positive about our progress thus far. Let’s see what comes next.

Step Two – Leave your job

I woke up this morning with the same thoughts I’ve had for several weeks now – “What the heck are we thinking?!!”

  • We’ve already rented out the house and moved in with my Mother-in-Law
  • Today we both retire from our jobs

We’ve been saving for decades to get to this day, but something a friend of ours (John Brewer) once said is stuck in my head. He once told us the transition from ‘working and saving’ to ‘retired and spending’ those savings is a tough one. Working to get past that hurdle is my first goal.

As things have it, today we each retired.  Both Julie and I have been fortunate to have great careers. We each count many of our coworkers among our friends – Julie at Citi Bank and me at M&T Bank. The various retirement gatherings this past week have been bittersweet celebrations as we’ve also said goodbye to many friends that we’ll only see infrequently as we move forward with our travel plans.

This evening and tomorrow we’re packing.  Sunday we’re striking out.  Our first major stop is Georgetown, DC and babysitting the grandkids.  We can’t wait, but, “What the heck are we thinking?”

PlatformIO for Arduino on Linux Command Line

So I had a challenge that required me to keep running up and downstairs as I was troubleshooting a new project. I’m having a problem with a temperamental water heater and decided to monitor it remotely. I have a photo-resistor taped to the water heater’s status LED and I use an Arduino Nano to capture and time the LED flashes and gaps. Then I send the results out the Nano’s USB interface to a Linux server I have running in the basement, conveniently close to the water heater.

Not having a laptop, I was using minicom to watch the USB traffic remotely from my desktop on the main floor of the house. Based on my observations of the USB traffic and minimal documentation on the Honeywell WV4460 temperature control, I’d come up with a programming change, take the stairs to the basement, disconnect the USB, pull the Nano and trek back upstairs to reprogram and flash it. While this started to become a chore, things got a little better as I employed a second Nano I had laying around. Now I’d reprogram the second board and just swap them. I still had to run up and down the stairs, but other than the device port changing every time I swapped out a board, it was a bit easier.

About the 10th trip back downstairs I had a thought. (First I thought – how many times is this gonna take to get it right…) My next thought was recalling that a while back I installed PlatformIO and Atom on my windows machine just to take it for a spin programming ESP8266 boards. Since it’s supposed to work with Arduinos and run on Linux so I wondered if it had a CLI. (My Linux server is CLI only with no GUI). Sure enough, it did and since I already have pip installed –
Sudo pip install -U platformio

The directory layout under Linux is the same as on Windows so I created an Arduino workspace named wheat_v3 (for WaterHEATer version 3) and initialized it.
cd ./wheat_v3
platformip init
platformio init --board=nanoatmega328

I then created a main.cpp in the src directory and did a quick copy/past of the Arduino native code, made some minor changes and saved it. Then from the ./wheat_v3 directory this is what my edited platformio.ini looks like:

[env:nanoatmega328]
platform = atmelavr
board = nanoatmega328
framework = arduino
upload_port = /dev/ttyUSB1

I ran platformio run –target upload a few times and cleaned up a few errors. Once the issues were cleaned up I got a clean compile and upload! Now each time I need to make a change to the code on the Nano I just kill the server side application to release the USB port and compile/upload. This is so fast and easy you’ll love it if you’re interfacing a micro-controller with Linux.

Raspberry PI GPIO

Raspberry Pi connected to a breadboard with LEDs and resistors.

On Raspberry PI I use the WiringPi library for both C and Python development. Below is an example of cycling through three GPIO pins to light up a set of LEDs.

  • GPIO 17 – Pin 6 maps to the WiringPi logical pin 0
  • GPIO 22 – Pin 7 maps to the WiringPi logical pin 2
  • GPIO 27 – Pin 7 maps to the WiringPi logical pin 3
[code lang=”c”]#include int main (void) { int offset; offset = 100; wiringPiSetup () ; pinMode(0, OUTPUT); pinMode(2, OUTPUT); pinMode(3, OUTPUT); for (;;) // Loop continously { digitalWrite (0, HIGH) ; delay(offset); // delay ‘offset’ miliseconds digitalWrite(0, LOW); // turn off 0 digitalWrite(2, HIGH); // turn on 2 delay(offset); digitalWrite(2, LOW); // turn off 2 digitalWrite(3, HIGH); // turn on 3 delay (offset); digitalWrite(3, LOW); // turn off 3 } // Loop back and start over return 0 ; }[/code]

Compile using gcc:

#gcc gpiox.c -o wp gcc wpiox.c -o wp -lwiringPi

The ‘-lwiringPi’ tells the gcc compiler to use the wiring Pi library. Then run using…
#./wp

And watch the LEDs flash…

Wireless RFM69HW – Part II

Gateway Node

The weekend is here and another chance to start poking around with my new RFM69HWs. Here’s my plan. I initially want to get the gateway node connected to a Raspberry PI in my basement via I2C. (I know, there’s probably an easier way, but, hey – I’m doing this for fun and to get better understanding of how I can leverage these boards.) The Pi should be able to poll the gateway periodically to get updated temperature data. I’ll figure out the logging later, by MySQL and a basic graph should give me a good view.

Close-up of a labeled circuit board with various pins and components.Connecting the Anarduino Gateway (GW) to the Pi is pretty straight forward. The GW uses 3.3VDC which is available on Pin 1 of the Pi. The I2C pins on the Pi are close by as well on Pin 3 and 5 with a GND pin just down the way at Pin 9. You can see in the image on the right that the 3.3 VIN and GND pins are on the same side as the analog pins; that makes wiring easy. In the following table I’ve laid out the pin mapping between the Anarduino and the Raspberry PI.

[table “T1” not found /]

The heart of the code for the gateway is very compact. Lines 7-9 initialize the board with the defined frequency, network and node ID. These are configured with #define statements. In this case the board is 433 mhz, the networkID is 100 and this node is set as 2.


#define NODEID 2 // GateWay - each node must be unique
#define NETWORKID 100 // Same on all nodes that talk to each other
#define FREQUENCY RF69_433MHZ

[ccN lang=”c”]
void setup() {
Serial.begin(9600);
delay(10);

// RFM69HW setup
Serial.println(“RFM69HW config and setup…”);
radio.initialize(FREQUENCY, NODEID, NETWORKID);
radio.setHighPower(); // only for RFM69HW!
radio.encrypt(null);
Serial.println(“RX at 433 Mhz”);

Serial.print(“GPIO and I2C config and setup…”);
Wire.begin(SLAVE_ADDRESS); // initialize i2c as slave

// define callbacks for i2c communication
Wire.onReceive(receiveData);
Wire.onRequest(sendData);
Serial.println(“\nReady.”);
}

void loop() {
char inData[10];

if (radio.receiveDone())
{
memset(inData, 0, 10);
Serial.print(“#[“);
Serial.print(radio.SENDERID, DEC);
Serial.print(“] “);
for (byte i = 0; i < radio.DATALEN; i++){ Serial.print((char)radio.DATA[i]); inData[i] = (char)radio.DATA[i]; } if(inData[0] == 'T') strcpy(cT, inData); if(inData[0] == 'B') strcpy(cB, inData); Serial.print(" [RX_RSSI:"); Serial.print(radio.RSSI); Serial.print("]"); if (radio.ACKRequested()) { byte theNodeID = radio.SENDERID; radio.sendACK(); Serial.print(" - ACK sent."); } Serial.println(); } } [/cc] Lines 30-37 handle data from the remote node. Temperature data is prefixed with 'T' and battery data with 'B'. Both are stored and delivered to the Raspberry Pi on I2C request. Next let's look at the remote node.

Remote (Sensor) Node

Last week I added an antenna to each of the boards. This week I’ll design and build the remote temperature sensor. I selected a SparkFun TMP102 sensor; it’s small, fast and easy to work with. Because the remote node will be running on battery, I also wanted to add the ability to monitor the current battery output so I can (1) know when I need to replace the batteries but also (2) so I can optimize the configuration of the board to maximize battery life.

Circuit diagram showing TMP102 temperature sensor connected to RS485 module.
RFM69HW Anarduino Mini with TMP102 Sensor

The two resistors act as a voltage divider with the resulting voltage compared to the internal 1.1v reference. Other than that you can see the connections are pretty straight forward with the I2C SDA and SCL pins connected between the sensor and the Anarduino.

Power consumption proved to be an issue as the remote node was rapidly chewing through the battery. I found a library (LowPower.h) that looked pretty good and installed it. SO far I’m seeing good results. Here’s the headers for the node:

Setup if pretty sparse with the reference voltage set to INTERNAL – 1.1v and the RMF69HW is configured. Because I’m not overly concerned about the privacy of temperature data I’ve set encryption off, however it’s nice to have this feature available. The RFM69HW supports a high-power mode which I’m using.